ลงมือทำกันเล้ยย!!!!!!!!!!!!!
ในการทำ Image Classification ครั้งนี้จะมีผลไม้ทั้งหมด 4 ชนิด คือ
แอปเปิ้ล,กล้วย,องุ่น และส้ม
ขั้นตอนแรก ทำการโหลด dataset ที่จะใช้ในการทำ Image Classification แล้วเก็บในโฟลเดอร์

เปิด jupyter notebook แล้วเริ่มขั้นตอนได้เลยย

new python ขึ้นมา
ทำการ config ให้ tensorflow ทำงานที่ GPU
config = tf.compat.v1.ConfigProto()
config.gpu_options.allow_growth = True
sess = tf.compat.v1.Session(config=config)
print( ‘Tensorflow Version:’, tf.__version__)
print(“GPU Available::”, tf.config.list_physical_devices(‘GPU’))

import Libary ที่จำเป็นเข้ามา
import tensorflow as tf
import PIL
from tensorflow.keras import layers
import matplotlib.pyplot as plt
import numpy as np
import pickle as p
import plotly
from tensorflow.keras.models import load_model
from tensorflow.keras.models import model_from_json
import plotly.graph_objs as go
from tensorflow import keras
from tensorflow.keras.models import Sequential

เตรียมชุดข้อมูล
import pathlib
data_set_dir = “C:/Users/Phakorn/Desktop/fruit”
data_dir = pathlib.Path(data_set_dir)
image_count = len(list(data_dir.glob(‘*/*.jpg’)))
print(“count of image which .jpg : “,image_count)

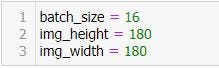
Data Preparation
ตั้งค่าความกว้างและความสูง คือ 180*180
batch_size = 16
img_height = 180
img_width = 180
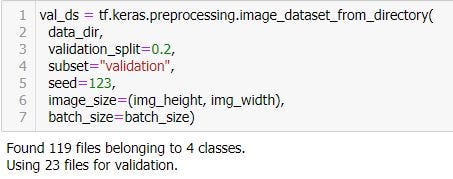
แบ่งข้อมูล training และ ข้อมูล validate
train_ds = tf.keras.preprocessing.image_dataset_from_directory(
data_dir,
validation_split=0.2,
subset=”training”,
seed=123,
image_size=(img_height, img_width),
batch_size=batch_size)

val_ds = tf.keras.preprocessing.image_dataset_from_directory(
data_dir,
validation_split=0.2,
subset=”validation”,
seed=123,
image_size=(img_height, img_width),
batch_size=batch_size)
แสดงการสุ่มรูปภาพจาก dataset ที่หามาได้
import matplotlib.pyplot as plt
plt.figure(figsize=(10, 10))
for images, labels in train_ds.take(1):
for i in range(9):
ax = plt.subplot(3, 3, i + 1)
plt.imshow(images[i].numpy().astype(“uint8”))
plt.title(class_names[labels[i]])
plt.axis(“off”)

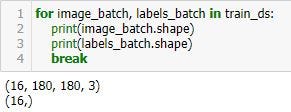
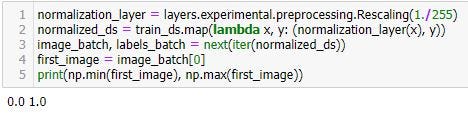
ขั้นตอนต่อไปจะเช็คข้อมูลของ dataset และจะทำการ Normalization
for image_batch, labels_batch in train_ds:
print(image_batch.shape)
print(labels_batch.shape)
break
normalization_layer = layers.experimental.preprocessing.Rescaling(1./255)
normalized_ds = train_ds.map(lambda x, y: (normalization_layer(x), y))
image_batch, labels_batch = next(iter(normalized_ds))
first_image = image_batch[0]
print(np.min(first_image), np.max(first_image))
Create Model => การสร้าง model
num_classes = 4
epochs=10
model = Sequential([
layers.experimental.preprocessing.Rescaling(1./255, input_shape=(img_height, img_width, 3)),
layers.Conv2D(16, 3, padding=’same’, activation=’relu’),
layers.MaxPooling2D(),
layers.Conv2D(32, 3, padding=’same’, activation=’relu’),
layers.MaxPooling2D(),
layers.Conv2D(64, 3, padding=’same’, activation=’relu’),
layers.MaxPooling2D(),
layers.Flatten(),
layers.Dense(128, activation=’relu’),
layers.Dense(num_classes)
])
model.compile(optimizer=’adam’,
loss=tf.keras.losses.SparseCategoricalCrossentropy(from_logits=True),
metrics=[‘accuracy’])
model.summary()

ขั้นตอนต่อไป
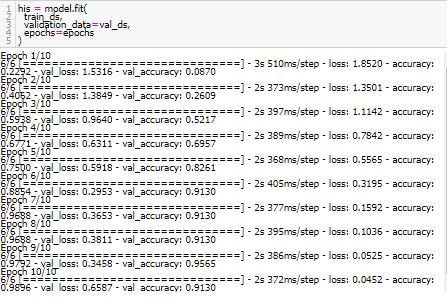
Train Model
his = model.fit(
train_ds,
validation_data=val_ds,
epochs=epochs
)
epochs ที่กำหนดคือ 10 ก็จะทำการ Train model 10 รอบ
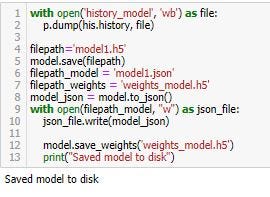
หลังจาก train model เสร็จก็จะ save model ต่อ
with open(‘history_model’, ‘wb’) as file:
p.dump(his.history, file)
filepath=’model1.h5'
model.save(filepath)
filepath_model = ‘model1.json’
filepath_weights = ‘weights_model.h5’
model_json = model.to_json()
with open(filepath_model, “w”) as json_file:
json_file.write(model_json)
model.save_weights(‘weights_model.h5’)
print(“Saved model to disk”)
Load Moddel ต่อเลย
with open(‘history_model’, ‘rb’) as file:
his = p.load(file)
filepath=’model1.h5'
filepath_model = ‘model1.json’
filepath_weights = ‘weights_model.h5’
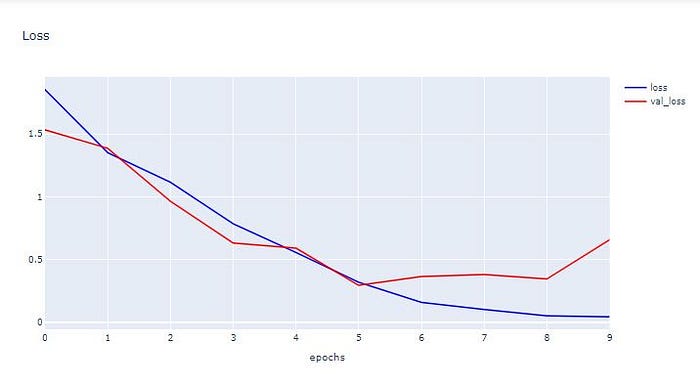
h1 = go.Scatter(y=his[‘loss’],
mode=”lines”, line=dict(
width=2,
color=’blue’),
name=”loss”
)
h2 = go.Scatter(y=his[‘val_loss’],
mode=”lines”, line=dict(
width=2,
color=’red’),
name=”val_loss”
)
data = [h1,h2]
layout1 = go.Layout(title=’Loss’,
xaxis=dict(title=’epochs’),
yaxis=dict(title=’’))
fig1 = go.Figure(data, layout=layout1)
plotly.offline.iplot(fig1, filename=”testMNIST”)
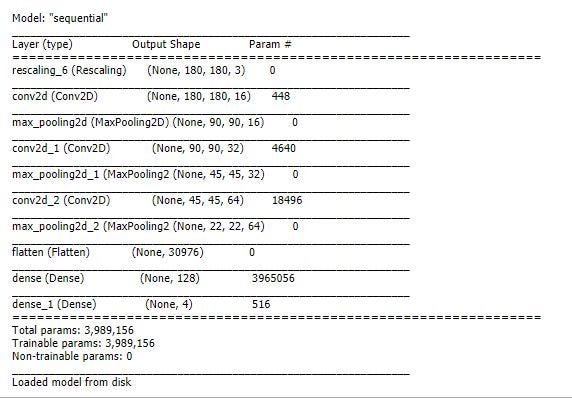
predict_model = load_model(filepath)
predict_model.summary()
with open(filepath_model, ‘r’) as f:
loaded_model_json = f.read()
predict_model = model_from_json(loaded_model_json)
predict_model.load_weights(filepath_weights)
print(“Loaded model from disk”)

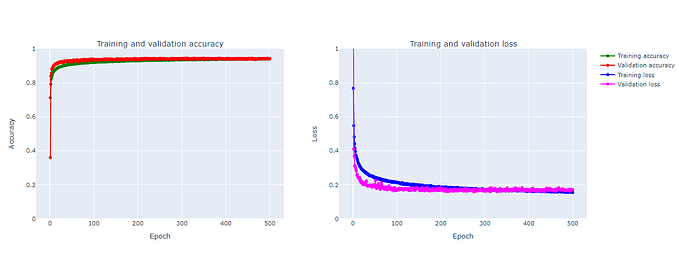
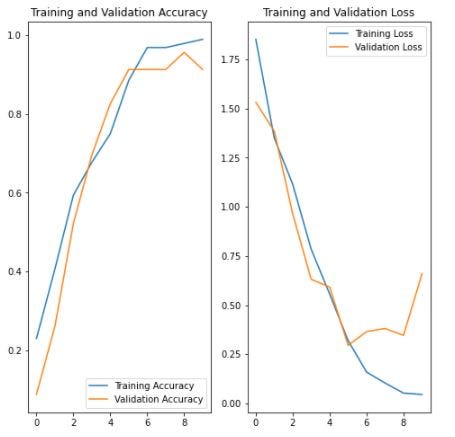
ขั้นตอนการ Visualization
acc = his[‘accuracy’]
val_acc = his[‘val_accuracy’]
loss=his[‘loss’]
val_loss=his[‘val_loss’]
epochs_range = range(epochs)
plt.figure(figsize=(8, 8))
plt.subplot(1, 2, 1)
plt.plot(epochs_range, acc, label=’Training Accuracy’)
plt.plot(epochs_range, val_acc, label=’Validation Accuracy’)
plt.legend(loc=’lower right’)
plt.title(‘Training and Validation Accuracy’)
plt.subplot(1, 2, 2)
plt.plot(epochs_range, loss, label=’Training Loss’)
plt.plot(epochs_range, val_loss, label=’Validation Loss’)
plt.legend(loc=’upper right’)
plt.title(‘Training and Validation Loss’)
plt.show()

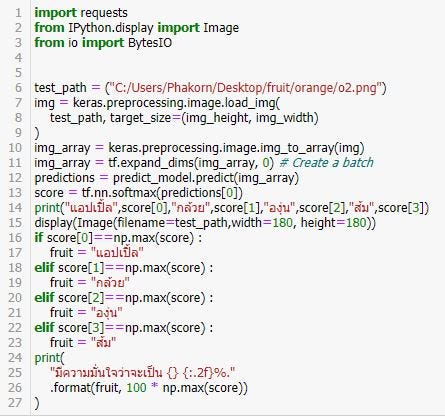
ขั้นตอนสุดท้าย Prediction
import requests
from IPython.display import Image
from io import BytesIOtest_path = (“C:/Users/Phakorn/Desktop/fruit/orange/o2.png”)
img = keras.preprocessing.image.load_img(
test_path, target_size=(img_height, img_width)
)
img_array = keras.preprocessing.image.img_to_array(img)
img_array = tf.expand_dims(img_array, 0) # Create a batch
predictions = predict_model.predict(img_array)
score = tf.nn.softmax(predictions[0])
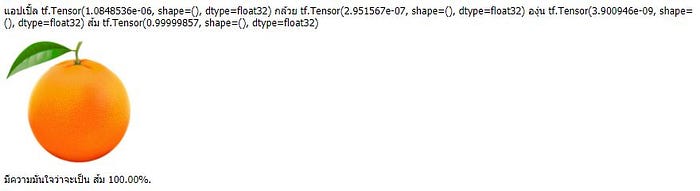
print(“แอปเปิ้ล”,score[0],”กล้วย”,score[1],”องุ่น”,score[2],”ส้ม”,score[3])
display(Image(filename=test_path,width=180, height=180))
if score[0]==np.max(score) :
fruit = “แอปเปิ้ล”
elif score[1]==np.max(score) :
fruit = “กล้วย”
elif score[2]==np.max(score) :
fruit = “องุ่น”
elif score[3]==np.max(score) :
fruit = “ส้ม”
print(
“มีความมั่นใจว่าจะเป็น {} {:.2f}%.”
.format(fruit, 100 * np.max(score))
)